Showing posts with label linux. Show all posts
Showing posts with label linux. Show all posts
Tuesday, April 18, 2017
Windows Repair With Linux
Windows Repair With Linux

Linux is a Powerful Windows Tool
If you aren?t particularly interested in obscure operating systems, the idea of playing around with Linux probably isn?t an appealing one. Linux, though, is a great Windows troubleshooting tool. Even if you want to have nothing to do with Linux for day-to-day computing, you should still take a look at it for what it can to for your Windows computing.
Your first step to using Linux as a troubleshooter ? making a Linux CD
To use Linux on your Windows computer, you need to first find the right version for Windows troubleshooting purposes and keep a copy ? either on a CD or a USB flash drive.
Ubuntu is considered one of most versatile Linux versions available. Once you have a bootable version of Ubuntu you have a great deal of power fixing your Windows system. Here are a few ways that Ubuntu can make your life on Windows easier.
Suspect that a hardware component on your computer is defective?
If your computer slows down at any point, it would be reasonable to wonder if there was something wrong with one of the components ? the hard disk, the motherboard, the RAM or anything else. Sometimes, when you have a problematic PC, testing your computer?s hardware on another operating system could be an invaluable troubleshooting tool.
Ordinarily, you would need to install Windows all over again on the troublesome computer. You don?t need to do any such thing with Ubuntu. You can simply set your computer to boot directly off the Ubuntu CD and get down to business.
- If the problems that you suspected hardware-related disappear on Ubuntu, you know right away that there?s nothing wrong with the hardware.
- An Ubuntu program called memtest 86+ helps you test your computer?s hardware components ? your hard drive, RAM and others.
Locked yourself out of your own computer?
It can be difficult to get into a system when you don?t remember your password. If you can?t seem to remember your password, you don?t to reinstall your Windows. Instead, you just need to run Ubuntu, use a few simple instructions and get in. You will find detailed instructions on the Internet.
Cleaning your computer of viruses
Antivirus doesn?t always help with very difficult viruses. Sometimes, you need software that takes a special angle.
Kaspersky actually sells a Linux product for Windows. The idea with this product is that even antivirus software can only go so far clearing an operating system. For serious infestations, software that runs on another operating system is ideal. You only need to download a portable version of trusted antivirus software for Linux ? Avast is one instance.
Fixing a damaged computer DVD
Many people don?t know how deeply scratched CDs can be resurrected with the right tools. For this ? Linux software called the ddrescue helps. You only need to download the software and follow simple instructions.
This only scratches the surface of Linux?s enviable bag of tricks. If you work with computers on a day-to-day basis, you deserve to explore this subject.
Available link for download

Sunday, April 9, 2017
Windows Macinthos dan Linux dalam 1 PC
Windows Macinthos dan Linux dalam 1 PC

Bagaimana kalau PC kita bisa digunakan untuk triple boot? pasti nya PC kita serasa keren ya. disini ane akan sharing gimana sich caranya menggunakan triple boot tersebut. disini Windows menggunakan versi Windows 7 Home Premium dengan BCD, Mac OS X menggunakan OS X Snow Leopard iATKOS S3 v2 dengan Chameleon Bootloader, dan GNU/Linux menggunakan BlankOn 7 Beta 1 dengan GRUB2.
Syarat dan Saran sebelum eksekusi :
- Instal MAC OS X ke partisi primary 1 atau 2, intinya MAC OS X hanya bisa di install di partisi primary. hal ini dilakukan untuk mengatasi kegagalan saat booting
- Windows dan Linux dapat di instal ke partisi logical.
Cara pertama : OS X Chameleon sebagai bootloader
cara pertama ini menggunakan chameleon EFI Bootloader sebagai bootloader utama yang akan memuat 3 OS tersebut. dan untuk cara ini, chameleon harus di install paling akhir setelah kedua OS lainnya terinstall.
- Pada Windows : pada saat instalasi hackintosh, biasanya windows tidak dapat di jalankan dengan sempurna. untuk memperbaiki eror tersebut, lakukan booting dengan DVD Installer windows, kemudian pilih opsi repair your computer. dari command prompt, jalankan disk disk part, kemudian masuk ke partisi windows dan aktifkan partisi windows dengan perintah active. kemudian tutup comman prompt dan pilih startup repair. jika sudah masuk windows, jalankan lagi diskpart dan aktifkan partisi tempat Mac OS X terinstal.
- Pada Linux : sangat disarankan lakukan hal ini sebelum instalasi Hackintosh, agar setelah repair windows kita bisa langsung menjalankan Linux BlankOn. Periksa letak dari partisi sistem/root GNU/Linux BlankOn menggunakan perintah df atau fdisk, lalu instal grub pada partisi sistem/root tempat Linux terinstal.
ketikkan perintah berikut :
sudo grub-install/dev/sdx -f
atau
sudo grub-install/dev/sdx --force
nb : untuk dev/sdx, sesuaikan dengan partisi tempat terinstallnya Linux
Cara Kedua : Windows Boot Manager sebagai bootloader
Dengan cara kedua ini, pastikan Linux atau Mac OS terinstal terlebih dahulu karena cara ini menggunakan Windows boot loader sebagai bootloader utama.
- Pada Linux : instal grub pada partisi sistem/root tempat install Linux. partisi yang berisi sistem windows juga harus aktif sebagai partisi boot, dan cara untuk mengangtikannya sama seperti cara pertama di atas. untuk memudahkan konfigurasi, gunakan EasyBCD yang dapat di download disini. lalu jalankan add new entry, kemudian simpan settingan dan restart
Cara ketiga : Linux sebagai Bootloader
cara terakhir ini, linux sebagai bootloader untuk memilih mana os yang akan digunakan. disini, untuk windows dapat ditambahkan secara otomatis oleh sistem. sedangkan untuk Mac OS, kita harus melakukan sedikit trik.
perhatikan cara berikut :
- edit /etc/grub.d/40_custom menggunakan editor dan tambahkan perintah berikut ini pada baris paling akhir.
menuentry"Mac OS X Snow Leopard"{
insmod hfsplus
et root=(hd0,X)
multiboot/boot
}
sesuaikan hd0,X dengfan letak partisi tempat Mac OS X diinstal.
untuk mengetahui letak partisi tempat Mac OS X diinstal, gunakan perintah berikut sudo fdisk -1 . setelah menambahkan opsi OS X ke /etc/grub.d/40_custom, lakukan update agar opsi tersebut ditampilkan oleh grub pada saat boot dan caranya jalankan perintah sudo update-grub. setelah semua langkh diatas dilakukan, lakukan restart dan selamat PC anda sudah bisa melakukan triple boot.
Available link for download
Wednesday, January 25, 2017
UNetbootin to create a Linux USB from Linux
UNetbootin to create a Linux USB from Linux
How to Install and Use UNetbootin from Linux: UNetbootin is a Live USB creation tool that can be used to create a Live Linux USB flash drive. One nice feature of UNetbootin is that the tool is offered for Windows and Linux. In the following, I will cover how to quickly get UNetbootin up and running within an Ubuntu Linux Operating Environment.
UNetbootin was created by Geza Kovacs, released under GNU GPL v2.
Official UNetbootin Homepage: http://unetbootin.sourceforge.net
How to Install and Run UNetbootin under Ubuntu Linux
- Open a terminal (applications > accessories > terminal)
- Type
wget unetbootin.sourceforge.net/unetbootin-linux-latest - Type
chmod +x ./unetbootin-linux-* - Type
sudo apt-get install p7zip-full - Type
sudo ./unetbootin-linux-*Alternately, you can double click the unetbootin-linux-* file to run it, since it was marked executable in step 3.
How to Use UNetbootin under Ubuntu Linux
Insert your USB flash drive and Start UNetbootin (See step 5 above)
Option One ? Distribution: Let UNetbootin fetch the Select Linux Distribution files from the internet to put on your USB.
(1) Select a Linux Distribution (2) Select a specific Version (3) Make sure the correct USB Drive is detected and Click OK 
Or you can use Option Two?
Option Two ? Diskimage: Browse to an ISO and have UNetbootin copy its contents to your USB.
(1) Browse to the ISO Image you would like UNetbootin to put on USB (2) Make sure the correct USB Drive is detected and Click OK 
Once the UNetbootin installer has completed, click Reboot Now 
Set your system BIOS or boot menu to boot from the USB device and enjoy your favorite Live Linux on USB
Available link for download
Tuesday, November 29, 2016
VMware Player 6 0 1 Installation in Linux
VMware Player 6 0 1 Installation in Linux
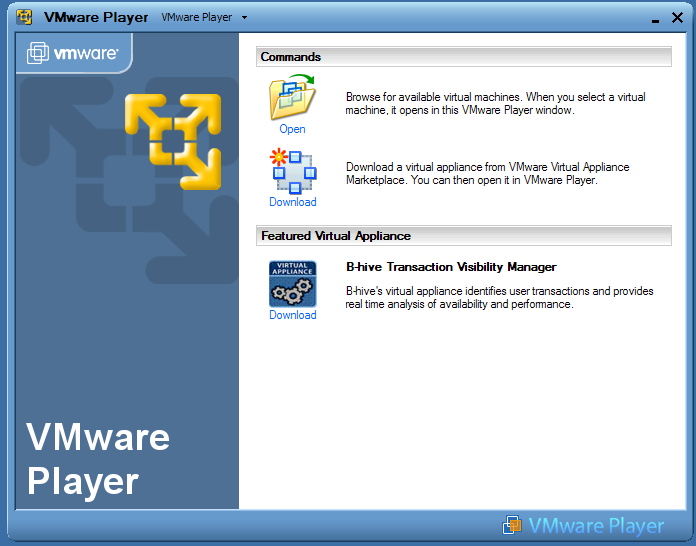
VMware Player has been updated to version 6.0.1recently which resolves some known issues. To check what has been fixed in this latest update, gohere.
In this tutorial, we will see how to install VMware Player 6.0.1 in the following distros:
- Ubuntu 13.10/13.04/12.10 or older
- Linux Mint 16/15/14 or older
VMware Player 6.0.1 Installation
to install VMware Player 6.0.1 in Ubuntu/Linux Mint, run firstly this command:
sudo apt-get install build-essential linux-headers-`uname -r`
Under a 32-bit system, you can install VMware Player with the following commands:
mkdir ~/VMware && cd ~/VMware
wget -c http://goo.gl/kkfRJg -O VMware-Player-i386.bundle.tar
tar -xvf VMware-Player-i386.bundle.tar
chmod +x VMware-Player-6.0.1-1379776.i386.bundle
sudo sh VMware-Player-6.0.1-1379776.i386.bundle
For 64-bit systems, enter these commands:
mkdir ~/VMware && cd ~/VMware
wget -c http://goo.gl/Uxia2s -O VMware-Player-x86_64.bundle.tar
tar -xvf VMware-Player-x86_64.bundle.tar
chmod +x VMware-Player-6.0.1-1379776.x86_64.bundle
sudo sh VMware-Player-6.0.1-1379776.x86_64.bundle
Available link for download
Subscribe to:
Posts (Atom)