Tuesday, April 25, 2017
Troubleshooting After upgrading from Vista to Windows 7 cant download anything and Youtube shows a black screen Error
Troubleshooting After upgrading from Vista to Windows 7 cant download anything and Youtube shows a black screen Error
After upgrading from Vista to Windows 7, cant download anything and Youtube shows a black screen.
Hello,
I upgraded from Vista to Windows 7 Home Premium.
I bought the full version, but just chose to upgrade, not fully install.
I did this because a Windows Update caused a problem with my network card software and I lost my Internet Connectivity (my computer could not "see" the network.)
After the update, which ran fine, I got my Internet back, but now I cant download a thing.
If I try to go to Youtube it doesnt play anything, the screen is just black.
Any suggestions? Very frustrated.
I am running AVG Internet Security with Windows Defender Firewall.
Thank very much.
Anwsers to the Problem After upgrading from Vista to Windows 7, cant download anything and Youtube shows a black screen.
Download Error Fixer (Free)
Hi,
úÿÿÿÿÿÿÿÿ Do you receive any error message while downloading the files?
úÿÿÿÿÿÿÿÿ Which browser are you using to download the files?
ÿ
Let?s follow the steps provided below and check if that helps:
Method 1:
I would suggest you to use the Internet Explorer in No Add-on mode.
To run in No Add-on mode follow the steps below ?
a.
Click Start, and then type Internet Explorer in the Start Search box.
b.
Click Internet Explorer (No Add-On).
Internet Explorer opens without add-ons, toolbars, or plug-ins.
c.
Test Internet Explorer to verify that it works correctly.
If the issue is not present in No Add-on mode you may check which particular Add-on is interfering referring to the links provided.
You may also refer to the below links for further assistance on the issue ?
http://windows.microsoft.com/en-US/windows7/Internet-Explorer-add-ons-frequently-asked-questions
ÿ
Method 2:
If the issue persists I suggest you to reset Internet explorer settings and check if you can resolve the issue ? Use the below steps to reset the Internet Explorer manually:
a.
Open Internet Explorer.
b.
Clickÿ Tools, and then clickÿ Internet Options.
c.
Click the Advanced tab.
d.
Under Reset Internet Explorer Settings, click Reset.
For more assistance refer to the link mentioned below ? To optimize Internet Explorer:
http://support.microsoft.com/kb/936213
If the above steps did not help then follow the steps provided belolw.
Method 3: Try to download and install the Adobe flash player and check for the issue.
Click on the link provided below to download and install Adobe flash player:
http://www.adobe.com/support/flashplayer/downloads.html#fp10.2
ÿ
Disclaimer: The Reset Internet Explorer Settings feature might reset security settings or privacy settings that you added to the list of Trusted Sites.
The Reset Internet Explorer Settings feature might also reset parental control settings.
We recommend
that you note these sites before you use the Reset Internet Explorer Settings feature.
How to Avoid Downloading Malware
Where are you getting the download?
There are malicious people who download valid copies of a popular download, modify the file with malicious software, and then upload the file with the same name. Make sure you are downloading from the developers web page or a reputable company.
Cancel or deny any automatic download
Some sites may automatically try start a download or give the appearance that something needs to be installed or updated before the site or video can be seen. Never accept or install anything from any site unless you know what is downloading.
Avoid advertisements on download pages
To help make money and pay for the bandwidth costs of supplying free the software, the final download page may have ads. Watch out for anything that looks like advertisements on the download page. Many advertisers try to trick viewers into clicking an ad with phrases like "Download Now", "Start Download", or "Continue" and that ad may open a separate download.
Recommended Method to Repair the Problem: After upgrading from Vista to Windows 7, cant download anything and Youtube shows a black screen.:


How to Fix After upgrading from Vista to Windows 7, cant download anything and Youtube shows a black screen. with SmartPCFixer?
1. Click the button to download Error Fixer . Install it on your computer. Open it, and it will scan your system. The errors will be shown in the list.

2. After the scan is finished, you can see the errors and problems need to be fixed. Click Fix All.

3. The Repair part is finished, the speed of your computer will be much higher than before and the errors have been fixed. You can also use other functions in SmartPCFixer. Like dll downloading, windows updating and print spooler error repair.

Related: Fast Solution to Problem: Error http//go.microsoft/fwlink/?linkId=144689 occurs at every reboot,,Troubleshooting:I tried to download the latest version of Internet Explorer 9, but it will not update the download due to a message that states "Wrong version of Internet Explorer installer" Error,Fast Solution to Error: IE9 Search Taking Me to Web Pages Rather Than Search Results,Random freezing after updating to SP1 (Windows 7) Tech Support,[Anwsered] Thinkpad 8611 Boot,How to Resolve - Svchost Helper?,Fast Solution to Problem: L30 101 Driver Windows 7,Troubleshooter of Error: Io Device,How to Fix Error - Dell Laptop Code 39?
Read More: Solution to Error: after scanning a word document, why are some words missing and other words scrunched together,Fast Solution to Problem: Aligning Metro Tiles in a Single File column?,How Can I Fix - ALGEBRA EQUATION graph IN EXCEL?,Troubleshooting:After performing Norton scan, lost all inbox emails.,[Solved] after os reinstall windows 7 ultimate will not do a complete system restore because it doesnt recognize the image on the external hard drive,Able To Install Multiple Versions Of Office?,A couple of years ago I downloaded a homeccounting template I cant find now is there a place where I can look for other templates that are not lis ated?,add on information bar - Preventing me from being able to download anything,addin for excel doesnt exist in "C:Program FilesMicrosoft OfficeOffice121033",Adding degrees on Calculator
Available link for download
Monday, April 17, 2017
The Most Important Passages From Apples Challenge to the FBI BusinessWeek
The Most Important Passages From Apples Challenge to the FBI BusinessWeek
Available link for download
Monday, April 3, 2017
Stop the Obama administration from surrendering authority over the Internet
Stop the Obama administration from surrendering authority over the Internet
Available link for download
Friday, March 31, 2017
Successfully recover photo files from an unrecognisable Sandisk 16GB Ultra card
Successfully recover photo files from an unrecognisable Sandisk 16GB Ultra card
This is a how-to guide to help you to ecover photo files from Sandisk 16GB Ultra card that cannot be recognised by CF Card reader. So that you can easily access and recover inaccessible Sandisk Card File with easy.
"I have a Sandisk 16GB Ultra card that occasionally had the camera reporting inability to access the card. The card is similarly unrecognisable on my computer CF card reader. I think the filesystem is toast, but I suspect the photo files are still intact. I would like to find ways where I can inspect the raw binary data in the card and hopefully recover the photos?"
Which is best to recover photos from corrupted Sandisk CF Card?
TestDisk allows direct access to disk data and file recovery from corrupt partition tables. PhotoRec is specifically targeted at recovering photos by identifying byte patterns in images (& video) files. However, TestDisk/PHotoRec would not recognise a corrupt card despite it showing up on "My Computer" as a non-formatted drive.
H-Data Recovery Master did the job.
If you are looking for solution when your SanDisk CF card was formatted or reformatted mistakenly, or the CF card has some problems, cannot read, memory card error on the camera? H-Data Recovery Master is able to recover lost photos from formatted CFcard (over 85% success rate) or from corrupted CF card (over 65% success rate). What makess the CF Card Recovery software fail to recover corrupted card photos: If you have taken many new pictures on the SD card after deletion or formatting (almost fill out the memory cards space in full), or your memory card was damaged badly, or physically broken, the lost photos are usually not recoverable.
View H-Data Recovery Master on Softonic
How to recover pictures/photos from 16 GB Compact Flash (CF) card

Note: Please do note that any attempt to recover data from a drive does require knowledge of the process and further damage can occur, so if you are unsure of what you are doing then do not write any further data to the SD Card and consult someone for help.
Step 1: Connet formatted CF card to Computer
Connect the compact falsh card to your computer via the card reader or via the USB drive.
Step2: Run H-Data Android Data recovery program on windows OS (Windows 8.1/8/7/Vista/XP...)
Step 3: Scan deleted files or lost data on Galaxy S6 microSD card
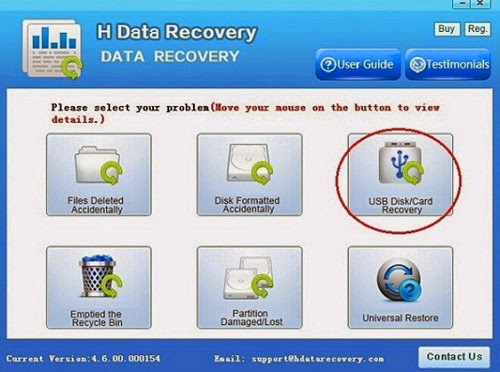
Select the "USB disk/Card recovery" then press "Next" to start scanning for recoverable photos, videos, and music files.
Step4: Preview and recover files stored on Galaxy SD card
After the program finish scanning all files, you can preview the files you wanted. Then mark the files you need. Click the ?Recover? button to recover deleted data on htc one.

Vist more posts:
What Is The Best Useful Compact Flash Card (CF Card) Photo Recovery
How to recover lost photos quickly from a formatted SD card
Recovery accidentally lost 3 weeks of pictures from digital camera SD card
Free H-Data Android SD Card Recovery- Detect & Recover 350+ file formats
Access and recover lost photos from SD Card with not formatted error
Available link for download
Wednesday, February 22, 2017
Will I get my deleted songs and videos back from my iPod
Will I get my deleted songs and videos back from my iPod

How do you recover the lost data now? Do you know any method to get the lost data back? Yeah, restoring backup is the best way but what if you do not have backup and you even do not know any other method to recover the lost data. Do not worry! One of the solutions that can help doing iPod music recovery is Kernel for iPod Data Recovery.
The software automatically recovers all data from the iPod that you have accidentally deleted. The software has the capability to help recovering deleted data. You just need to execute the following steps:
- Download the iPod music recovery software.

- Install the software.

- Attach iPod to the computer USB port.

- Launch the software. Kernel for iPod data recovery software appears, as shown below:

- Click the Standard Scan button.
- The software automatically detects the iPod and starts scanning it. Once the scanning process is done, the iPod music recovery software displays all recovered music files and videos. The software lists the recovered data in the left panel.
- Select any of the recovered files to check if it is working. The software displays the file preview, as shown below:

Kernel for iPod Music Recovery software can be installed on Windows 7, Windows Vista, Windows XP, Windows 2003, and Windows 2000 operating systems. For more information about tool, features and GUI, visit : http://www.softwaredatarecovery.net/ipodrecovery.html
Available link for download
Tuesday, January 31, 2017
System Image Recovery From OEM Partition
System Image Recovery From OEM Partition
Gigabyte Xpress Recovery2
Gigabyte Xpress Recovery2 supported motherboard provide system image recovery from OEM Partition for desktop computer with just pressing F9 while booting, when your computer face any problem. Xpress Recovery2 back up data on hard disks on SATA and PATA IDE controllers.System Requirements:
- Intel x86 platforms.
- At least 64M bytes of system memory.
- VESA-supported VGA cards.
Note:
1. Everything from your hard disk will be deleted. So backup your important file and data before proceeding.
2. Xpress Recovery2 will backup system image file at the end of the hard disk, so you must have enough (At least 4 GB recommended. But in actual you must have free unallocated space depending on the size of the data to be backed up) unallocated hard drive partition space in advance.
3. If you have not enough hard disk unallocated space then delete and make free unallocated space for data backup. As Xpress Recovery2 will backup image at the end of the Hard Disk so the last partition must be unallocated and must have enough space(As shown in the picture below) otherwise you will be given an error message like "Not enough Hard Disk space".
 |
| Gigabyte Unaalocated Space |
5. To install Xpress Recovery2 with clean Windows installation, boot from your Windows Installation disc. Go to window installation page. Delete all hard drive partitions. Just create one partition(Drive C:) and install window in the very partition and left the remaining partition unallocated for data backup(as Ive already mentioned in Step 3)
Steps:
1. Go to BIOS setting and make you CD/DVD ROM as your first device.Save setting and exit.
2. Insert your motherboard driver CD and restart your computer. After restart a message will be displayed.. "Boot from CD/DVD:"... "Press any key to boot from CD..." Press any key to enter Xpress Recovery2 setup
3. Xpress Recovery2 takes a few second to load.
 |
| Xpress Recovery2 |
4. Now Xpress Recovery2 setup page will start.
5. Select backup(with keyboard) and press enter.
 |
| Xpress Recovery2 |
6. Data backup will start. And it may takes a long time depending upon the size of your data to be backed up.
 |
| Xpress Recovery2 |
7. After completion restart. Data backup with Xpress Recovery2 has been done.
Additional Info:
1. The driver CD is just required for the first time only to install Xpress Recovery2. Thereafter user can access Xpress Recovery2 just by pressing F9 while booting.
2. Install Xpress Recovery2 immediately after installing OS, all required drivers and softwares.
3. Data restoration will replace everything of Drive C: with the backed up System Image.
Some Errors:
1. Not enough Hard Drive space- That means youve not sufficient space to backup in the last unallocated drive in your hard disk.
 |
| Xpress Recovery2 |
2. All primary partition is in use or IDE Drive not detected- That means youve no unallocated space at the end of your hard disk.
For other limitation and requirement go to Gigabyte Official Xpress Recovery2 page.
Available link for download
Wednesday, January 25, 2017
UNetbootin to create a Linux USB from Linux
UNetbootin to create a Linux USB from Linux
- Open a terminal (applications > accessories > terminal)
- Type
wget unetbootin.sourceforge.net/unetbootin-linux-latest - Type
chmod +x ./unetbootin-linux-* - Type
sudo apt-get install p7zip-full - Type
sudo ./unetbootin-linux-*Alternately, you can double click the unetbootin-linux-* file to run it, since it was marked executable in step 3.


Available link for download
Monday, January 16, 2017
Unpredictable cases that may lead to photo loss and how to recover deleted photos from Samsung Mobile Phone
Unpredictable cases that may lead to photo loss and how to recover deleted photos from Samsung Mobile Phone

You may delete a picture of memory value from your Phone SD card for many unpredictable cases that may lead to photo loss. Want to get back deleted photos, pictures from Samsung Galaxy Mobile Phone? Here we go!
Unpredictable cases that may lead to photo loss from Samsung mobile phones, such as:
Accidental Deletion: Delete important pictures instead of some not so insignificant ones by accident.
Unintentional Formatting: Reset Samsung phone and formatted the memory card without backing up those data.
Memory Card Corruption: Samsung external memory card is corrupted and all the data inside become inaccessible.
Virus Attack: Virus infected the Samsung mass memory and turned all files into shortcuts.
How to recover deleted photos pictures from Samsung Mobile Phone
Have you ever suffered experience with Samsung data loss and want to get back those lost photos and videos? Don?t panic. Samsung saved all photos taken on its memory card. When photos are deleted from Samsung Android phone by mistake, the data are not permanently gone. With a good data recovery tool, you can get them back in just a few clicks of mouse. Here H-Data Photo Recovery for Windows is recommended. It is a powerful as well as easy-to-use tool to recover deleted photos from Samsung mobile phones, such as Samsung Galaxy S6, Samsung Galaxy S5, Galaxy S4, Samsung Galaxy S3, Samsung Galaxy S2, Samsung Galaxy S, Samsung Galaxy Note III, Samsung Galaxy Note II, Samsung Galaxy Note, Samsung Galaxy S3 Mini, Samsung Galaxy S2 Plus, Samsung Galaxy Ace, Samsung Galaxy Y.
Simple Steps to Restore Pictures from Samsung Mobile Phones
Download photo recovery for Samsung, the software is available for Windows, but not Mac or mobile platforms.
Windows 2000/2003/XP/Vista/2008/Windows 7/Windows 8/Windows 8.1 supportted
Free Download file of photo recovery demo from softonic

Click here to get Pro Version H-Data Recovery Master
Step1. Connect android phone to computer. Then in Computer, check whether the smart phone shows as a drive letter (e.g. drive E: ).
Step 2. Run Galaxy phone recovery, select the "USB disk/Card recovery" then press "Next" to start scanning for recoverable photos, videos, and music files.
Step 3. You will see a list of recoverable files when scanning complete. Select those files you want to recover and press "Recover" button to save recovered files on computer.
View more post about free Samsung Galaxy Data Recovery
How to Recover Deleted Photo, Video from Samsung Galaxy S6/S5/S4/S3
Best Recovery App 2015 To Recover Deleted Files On Android SD Card
Get Free H-Data Card Recovery V4.6.00.000154 Full Version Crack
H-Data Deleted File Recovery Full Version Free Download
Whtas New with H-Data Recovery Wizard V4.6.00.000154 for recovering 500+ file formats
Free H-Data Android SD Card Recovery- Detect & Recover 350+ file formats
Available link for download
Tuesday, December 20, 2016
This 1 28 Million New Watch Is Made From Transparent Sapphire
This 1 28 Million New Watch Is Made From Transparent Sapphire


Available link for download
Monday, December 12, 2016
TabletSMS Android Application to Send SMS and MMS from Tablet
TabletSMS Android Application to Send SMS and MMS from Tablet

For Android tablet users, new application called TabletSMS this could be your best choice to make it easier to send messages. TabletSMS lets you can use to send SMS Android tablet using your mobile number.
TabletSMS is an extension of the application DeskSMS. To be able to use it, you need to install DeskSMS on your phone and install TabletSMS in tablets. That way you are then you receive an SMS message on your phone will be directly accessible in the Android tablet.
If you have not used DeskSMS, this is an Android app that allows you to send and receive messages from Gmail, Google Talk or Chrome extension. Now with TabletSMS, you can bring all the features DeskSMS to your Android tablet. That way you do not need to connect the mobile phone and tablet via Bluetooth just to access a variety of e-mail messages as well.
You can download. DeskSMS and TabletSMS free on Play Store (service $ 5 / year) and enjoy easy access to a variety of text messages directly on your Android tablet
Available link for download
Saturday, November 26, 2016
Tips iOS how to prevent iphone from heating up
Tips iOS how to prevent iphone from heating up
Each new version of the platform that was released could certainly still have bugs and imperfections here and there, it should be recognized. Looking at the history of releases earlier iOS versions, has always given a minor upgrade to remove various bugs so you can predict Apple will give you a similar minor update iOS 7 after the final version was released.
Problems on WiFi, wasteful batteries, bugs in the App Store as well as the latest and easy Passbook lockscreen cracked, never went to iOS 6. You certainly do not expect similar problems will arise in iOS 7 but from the reports of the developers who have been using iOS beta 7, their iPhone quickly overheating.
Heat source coming from the components inside the iPhone is not going to cause any permanent damage but it certainly would feel uncomfortable if you hold the iPhone in hot conditions.
To overcome the problem of overheating in the iPhone, you can unlock iOS setting 7 to make some changes: Privacy> Location Services> System Services.
From there you please change some of the options below to the OFF position:
- Diagnostics & Usage (function for reporting errors and problems to Apple).
- Location-based iAds (display ads based on your location).
- Cool Near Me (featuring popular events from friends on Facebook and Twitter via the notification).
- Wi-Fi Networking (look for the location where you are located via Wi-Fi hotspots when you are outside the reach of services).

In addition to the above options, you also need to know that GPS is a source of heat faster iPhone. For that you need to turn off all GPS-based services if you do not really need it. Applications such as Camera, Passbook, Safari, Shazam and Twitter always detect your position via GPS, for that you can change all the apps to the OFF position when not required.

To see if the location services are used or not, you can change the status bar icon to the ON position, located at the bottom of the System Setvices. In this way the purple location services icon will appear in the status bar at the top of the screen.

Another way to prevent overheating iPhone:
1. Replace car adapter.
2. Remove and set up your iPhone as a new device (no restore).
3. Do not attach the case when charging.
4. Charge your iPhone before traveling to the hot temperature
5. Turn off all unused services (Bluetooth, push notifications, etc..).
6. Position the screen brightness as low as possible
7. Turn off the turn-by-turn directions.
Tips to prevent overheating in the general can be used in all versions of iOS, including iOS 7. Good luck and hopefully you can avoid the iPhone overheating
Available link for download
Tuesday, November 8, 2016
The Incredible Story Of How Hackers Stole 100 Million From The New York Fed
The Incredible Story Of How Hackers Stole 100 Million From The New York Fed
Available link for download